What is the best defense strategy for Survival in Grand Theft Auto Online?
Before I jump into the maps, I have some words of advice when it comes to GTA Online's Survival Mode:
Advice:
Running for health/armor/ammo mid-round is suicidal
Once the round starts and bullets start flying, STAY PUT & STAY IN COVER! Don't get cocky and try to go Rambo on all the NPCs... you will be brought down in a matter of seconds. The only time you can run-and-gun is early on (WAVE 3 at the maximum). It can be very tempting to leave your spot and stock up, but it is important to remember survival punishes carelessness and rewards patience.Remember enemy spawn points
In survival, you can die in seconds, so always be aware of enemy spawn points. I cannot tell you how many times I have been shotgunned in the back at the start of a round just for being in the wrong place at the wrong time.Leave stragglers at the end of each wave
In this mode, people get shot, fall down, and bleed out. Best way to stock up before each wave is to shoot the last NPC in the leg or body (I recommend a pistol or SMG depending on the wave you are on). That gives you vital time to grab any and all the goodies you can before the next wave starts.USE BLINDFIRE!! (Holding RT or R2)
You rarely see people blindfiring. During the later waves (when it's you vs 30 NPCs w/ miniguns), getting out of cover is pretty much a death-sentence. You can have full health/armor and the moment you try locking-on, you are nearly dead. This is where blindfiring comes in. Blindfiring is surprisingly accurate and it takes very little to injure an enemy and have them "bleed-out". You can even take down helicopters by blindfiring. If you press up on the left stick when behind cover of a certain height, you can aim your blind fire. Just remember, there are times when you should lock-on and there are times when you shouldn't.
Fun Tips:
Helicopters spawn on waves 4, 7, & 10. They always spawn on waves with rocket launchers.
You can heal yourself with the snacks you pickup and buy at the store. This can give you full health when you need it the most! Do this by opening up the
Interaction Menu, go toInventory, and select one of the various snacks at the bottom of the list (P & Qs, Ego Chaser, Meteorite Bar, or eCola).
To open theInteraction Menu, hold BACK or SELECTYou can do combat rolls by holding down LT or L2 and pressing X or □
(NOTE: must have a gun in hand; you cannot roll unarmed or with grenades)Helicopters kill themselves off after a certain amount of time! If you are too nervous and/or lazy to shoot down the helicopters, just wait it out for about 10 min of it spawning - the chopper will land and die off :-D.
You can call in Merryweather for assistance
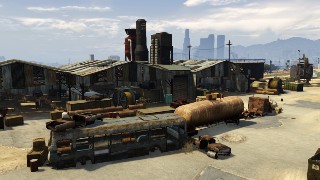
1) Boneyard

Minimum Recommended Players:
2
Best Location:
Behind the trailer (across from the barn)

Strategy:
Without question, this is the easiest survival map. There is a trailer near the player spawn point. Get behind it, take one side (your friend get the other) and watch as all the enemies come to you. Helicopters can't touch you and enemies can't flank you. You will almost always win if you stay put.
Fun Tip:
If you need health, you can always use the soda machine inside the barn (costs $1).

2) Railyard Survival

Minimum Recommended Players:
2 to 3
Best Location:
The red traincar

Strategy:
Head to the back of the red traincar. Your friend gets on one side and you, the other. You are safe from helicopters and enemies always come to you. Overall, nothing too difficult. Just make sure to use blindfire when the odds are stacked against you!
3) Sandy Survival

Minimum Recommended Players:
3 to 4
Best Location:
Behind the dumpster

Strategy:
The best area on this map is the dumpster. Helicopters can't hit you and enemies will constantly go out of cover to try to get to you. However, be wary of enemies trying to run around the dumpster, which happens at least once a wave. At close-range, enemies can kill you in one shot. My suggestion is to focus on your mini-map whenever an enemy is close, aim over the dumpster,shoot them in the head; however you can also immediately pistol-whip them, but that isn't always a sure thing. Always keep your eyes on the mini-map, constantly be on your toes, and you should be good!
4) Processed

Minimum Recommended Players:
3 to 4
Best Location:
In the back of the building (in a red dumpster or behind cars)

Strategy:
The best area is in the back of the building with the broken down cars. Have one person go into a red dumpster and the other behind the cars. Helicopters are not an issue on this map. The biggest nuisance stems from enemy spawn points: this map has the worst enemy spawn points of all the maps. Be aware of your surroundings, otherwise you may get shot in the back of the head.
5) Sawmill Plant

Minimum Recommended Players:
3 to 4 Players
Best Location:
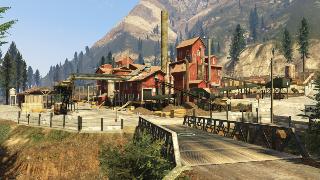
In a red dumpster under the plant (north-side of the map):


Strategy:
There are a number of places that are decent on this map, but without question, the red dumpster is the best. You are safe from helicopters and enemies will literally fall from the roof trying to get you like a pack of zombies (very funny). Also enemies will approach you from a distance, so you have plenty of time to shoot them on their way over to you. You can share the inside of the dumpster with another person and a third can hug the outside.
6) Del Perro Pier Survival

Minimum Recommended Players:
3 to 4 Players
Best Location:
The bathroom near the ferris wheel:
Strategy:
If you plan on staying in the bathroom, you need another person to get your back since you are close to two enemy spawn points:Ground units spawn hereOne person should hug the wooden wall (watch the first enemy spawn point) and the other should hug the side of a vending machine (watch for any cars). It is important that both of you keep your heads on a constant swivel before jumping out of cover. Fortunately, you are safe from helicopters so the main pressure will come from ground units. If things get really bad, you can always fall back into the bathroom and shoot any oncoming units with your shotgun. I also recommend planting sticky bombs around the area in case you get overrun.

Cars spawn here

7) Industrial Plant

Minimum Recommended Players:
4 Experienced Players
Best Location:
The very top of the Industrial Plant (NOTE: this spot is very vulnerable to helicopters):The blue dumpster close to the player spawn area:
(source: rockstargames.com)
Strategy:
Undeniably the hardest survival map. Unfortunately, there is no "go-to" spot on this map, since they all pretty much have their pros and cons. Helicopters are the primary threat on this map, so they need to be your top priority. Helpful tips:
- GET EACH OTHER'S BACKS! You need to work as a team, otherwise, you are doomed.
- Play with people you know!
From my experience, Randoms just make it harder (that's what she said)- Focus on helicopters the moment they appear. Have a friend focus on ground units, while you take out the choppers.
I hope this helps and let me know if you need anything else! Good luck!!
(edit) my bad - the map I was thinking of was "Processed" - if memory serves you start outside a large shed with a few dumpsters including a large, sled type dumpster at the back. Myself and two friends were able to do 10 waves easily from in here, only venturing out to knock off stragglers at round end. Deal with helicopters from inside unless you're too impatient in which chase, one or two can venture out and take them out.
The long sled type dumpster has a slope of garbage, at the end with the least trash is an excellent spot with a wide vantage and superb cover.
I've soloed Industrial Plant, there is actually a great spot to hide. In the corner of the fenced in area, to your left when you first spawn, there's a shipping container that has one end open and is on the second level of containers. Since it's elevated and at one end of the map, nobody really runs right up (sometimes they climb up though) and generally only come from one side. A few things to watch out for though:
if you want weapons, health, or armor, wound a guy at the end of a round and run out of cover to the opposite side of the map. If they're bleeding out, they only shoot at you with a pistol, so you should be safe
make sure you have plenty of ammo or patience when you get the first chopper, either hide in the back of the container a lot, or take out the chopper cautiously. I save the combat MG ammo for this. If you really want to wait it out though, just take out guys without exposing yourself to the chopper, it does land eventually and they come to shoot you on foot (blow up the chopper before the end of the round for the RP if you want)
there are guys who do go beyond the fence and shoot you from the opposite side of the container. Just keep an eye on the minimap and switch sides quickly to take them out, they have no cover on that side. You're vulnerable to fire from the other side so do it quickly.
there are guys who will climb up onto the catwalk above the container, so don't panic if you see a red dot right next to you, they can't shoot you from there and they'll move eventually
I've also soloed Boneyard using the trailer as cover. Just switch sides depending on how the enemies come at you.
I think the biggest thing I learned through experience that I wish I knew before was that the choppers land. You don't have to expose yourself to take them out.
And doing a survival is also great before doing other missions or death matches, because you have weapons and ammo you wouldn't normally have access to. Rank 15 running around with a minigun and RPGs, fun times!
